


A Guide to Creating Cherry Nails for Summer
As summer rolls in, nail art enthusiasts are always on the lookout for vibrant and playful designs to match the season’s energy. One popular trend this year is cherry-inspired nails, which encapsulate the fun and freshness of summer in a delightful way. This guide will walk you through the steps and tips for creating charming cherry nails, ensuring you stay on-trend while expressing your creativity.
Choosing the Right Colors
To kick off your cherry nail design, start with selecting the right colors. Typically, cherry nails feature bright red or deep burgundy shades, reminiscent of ripe cherries ready to be picked. You can enhance this basic color scheme by incorporating greens for the leaves and whites for accent details. Consider using gel polish for a long-lasting finish; it not only stays vibrant but also provides a glossy look. When picking your base color, think about your own style—whether you prefer bold statements or subtle elegance, the versatility of cherry nails can cater to both.
Prepping Your Nails
Before diving into the nail art, it’s essential to prepare your nails properly. Begin by ensuring your nails are clean and buffed for a smooth surface. If necessary, trim and shape your nails to your preferred length and style—whether that’s square, oval, or stiletto. This step is vital as a clean canvas allows for more precise designs. Don’t forget to apply a nail strengthener or base coat; this will protect your natural nails and help your polish adhere better, ultimately extending the life of your stunning cherry nails.
Mastering the Cherry Design
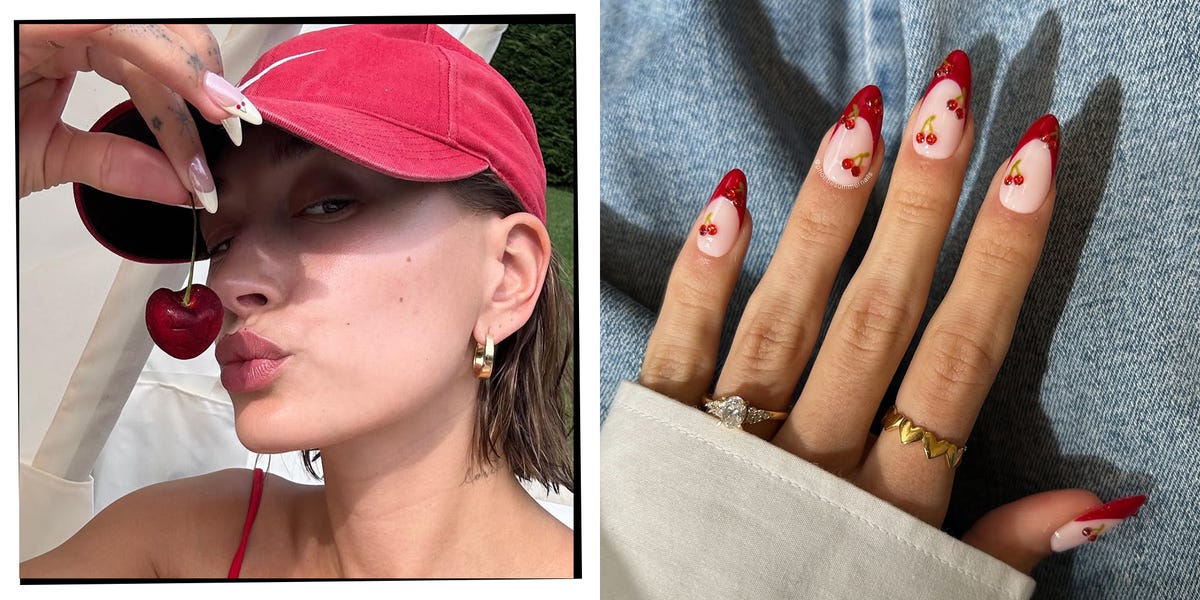
Now comes the fun part: actually creating the cherry design! Start with a base coat of your chosen red polish, letting it dry thoroughly. Once dry, you have a couple of options to create the cherry design itself. You can use nail art brushes or dotting tools to form little cherries on your nails. Position them randomly for a more playful look or cluster them together for a bolder statement. For added depth, use a lighter shade for highlights and a darker one for shadows. Adding tiny green leaves next to your cherries will complete the look and add a touch of freshness, making your nails pop with personality.
Adding Finishing Touches
After your cherries are perfectly placed, let your design sit until it’s fully dry, then seal it with a top coat. This not only protects your artwork but also enhances the shine, giving your nails a polished finish. To take your look to the next level, consider adding some additional elements like glitter or tiny rhinestones. Perhaps a sprinkle of gold or silver around the cherries could give your design a unique sparkle and draw more attention to your nails. Remember, details matter, and these finishing touches can make your cherry nails truly stand out.
Caring for Your Cherry Nails
With your cherry nails looking fabulous, you’ll want to keep them that way! Proper care is essential to maintain both the design and your nail health. To keep the polish from chipping, avoid harsh chemicals and use gloves while doing chores. Regularly moisturizing your hands and nails helps prevent dryness and keeps your nails looking vibrant. If you notice any chips or wear after a few days, a touch-up can significantly extend the life of your design. Embrace the season and enjoy showing off your gorgeous cherry nails, knowing that they are not only eye-catching but also a reflection of your creativity and style.
As you embark on this nail art adventure, remember that the creativity involved in designing cherry nails should be enjoyable and uniquely yours. Whether it’s your first time delving into nail art or you’re an experienced enthusiast, this design captures the essence of summer and allows for endless customization. So gather your supplies, let your imagination run wild, and have fun creating your cherry nails this summer!


